

19 Jul Timney Triggers – Ruger Precision Rifle Trigger Review with Trouble Shooting
This is a brief overview of the experiences, testing,problems, and solutions that I have experienced in the preparation the review on the Timney Trigger for the Ruger Precision. The full review will be available on 704 Outdoors’ YouTube channel involving the build “Project Precision”.
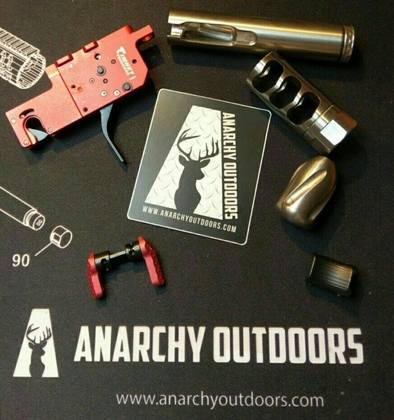
![]()
Upon the arrival of the Timney Trigger, I was unsure as to how I would like a two stage trigger in a precision rifle. Overall, I do like the trigger. It offers a crisp break on the second stage, with no creep or travel. As I expected on the first stage, it is very light, and has a smooth travel.
In my opinion, the first stage acts like a safety. It allows the marksman to reduce the second stage trigger pull weight, while still being able to safely handle the gun without accidental discharges due to the travel of the first stage. With that being said, I am impressed with the function of the trigger, even in a two stage platform. However, I am curious if a single stage trigger will be released from Timney for the Ruger Precision platform.
As I began the disassembly of the lower from the upper to access the trigger, the disassembly was simple and straight forward. The removal of the factory trigger went as planned. It was noticeable how tight and secure the factory trigger was in the housing as I slid the assembly toward the butt stock. I observed the Timney trigger closely before the install. I did notice that the safety linkage was easy to remove from the safety cam (which is no big deal because it will be secure once installed in the receiver). As I installed the trigger assembly, the fit of the trigger group to the receiver was noticeably much more loose than the OEM trigger. It slid forwards with ease, and I then torqued the allen bolt that secures the trigger group to the receiver. So far I didn’t notice any issues that would affect the function and performance of the trigger. I then installed a Seekins ambi- safety, and began to install the lower receiver to the upper receiver. This is where I began to have issues. The upper and lower receivers had interference with the trigger assembly, preventing a proper fit of the upper to the lower. I noticed that the safety was unable to function as well.
After trying the installation procedure several times, I began to look for what was preventing the fit. I noticed wear at the front of the “horse shoe” (Timney refers to the horse shoe as the half circle machined area where the safety fits into the trigger housing to actuate the safety cam). I took several measurements in various spots of the trigger and comparing these measurements to the OEM trigger. There were several measurements with some difference, and I then began working with Calvin, the designer and engineer with Timney that is over the Ruger Precision trigger build. We discussed the measurements, and tried different tactics in an effort to find a solution, including try the OEM safety. We were not able to complete the assembly on that day, however we had a plan for solution.
Calvin got a new trigger from the manufacturing line at Timney, and began to make modifications. We found that the interference was at the front/front top of the “horse shoe”. Calvin made adjustments in a program in his design specifically for this trigger. The adjustments that were made appeared to remove aluminum from the trigger housing (I am unsure of exactly how much, but would say in the .008″=.012″ range) at the front of the horse shoe and throughout the radius at the top of the horse shoe.
Once the modified trigger was in my hands, I installed the trigger with the Seekins Precision ambi safety. everything in the assembly process went great. The lower and upper went together as should. I tested the trigger several times, and it felt great. I then began to function the safety,and found a loose fit during the function of “safe to fire”modes. It felt as if the safety was going to slip passed the safety came during function. I decided to disassemble and try the OEM safety. I assembled the rifle, and functioned the safety mechanism numerous times. The function of the safety felt great. I noticed it felt much more solid, quieter, and engagement of the safety to the safety cam within the trigger assembly was immediate.
I have been operating the rifle for some time in this manner, and haven’t had any issues. I have reduced the pull weight of the second stage allowing for better trigger control. I have had the rifle apart several times for other modifications, and always try to remember to do a look over on the trigger inspecting for wear and issues. So far the trigger is
performing well without any noticeable issues (dirt, metal shavings, etc.).
My good friend, John Alden, also runs the RPR in 6.5cm. He purchased the Timney trigger as well. This occurred 4-5 weeks after the install of my Timney trigger. We went to do the install on his rifle and ran into the exact same issue. After examining the rifle for what felt like hours, he decided to loosen the two allen head bolts that secure the butt stock hinge assembly. With the Timney trigger installed, and the two allen bolts loose on the hinge assembly, we pulled back on the butt stock assembly and the upper and lower fell into place! We are unsure what this did to allow the upper and lower assemble correctly, but it worked. we functioned the safety several times, and the assembly functioned properly. I talked to Calvin at Timney, and discussed the procedure that we found that may be a potential trouble shooting method of install for the trigger. He was kind of speechless and shocked, as John and I was too.
John has been using the Timney trigger since. The trigger functions well, and he is very happy with it. We were shooting a week ago, testing the new PVA barrel nut with Lancer Systems 15” carbon fiber handguard on Project Precision. John noticed his safety function felt tighter than normal. We observed and discussed the issue shortly. We were not able to tackle the problem that day. We both feel like the butt stock hinge assembly had shifted slightly, creating a tight fit of the safety to the safety cam or possibly the trigger housing. The safety is still functioning, just feels tighter than normal. That is where we are at currently on the Timney trigger install, testing, and review with in the build “Project Precision” on 704
Outdoors TV Show and you tube network.
Overall, we are happy with the trigger and how it functions. We received two of the earliest Timney trigger assemblies that were available. New products sometimes have slight issues, and that should be expected. It’s all about how a company provides their best service to ensure that the issues are repaired and that the customer is completely satisfied. Timney has been behind us, and we have enjoyed analyzing, testing, providing feedback, and building a review not just on the trigger, but the company as well. Timney and their customer service
has listened, informed, and have went above and beyond to provide their best product possible.
Review will be announced when available….
Updates on John’s RPR Timney trigger to be continued….
No Comments